# Page 页面容器
Page 组件已注册到全局,无需单独引入。但如果需要引入到其他项目中,首先需要将该组件复制到目标项目的 src/components 目录,然后参考下面的如何引入。
Page 组件是一个 vue 模板页面的最外层容器,页面中仅能包含一个 Page 组件,即该组件不能嵌套和并列。
但 Page 中可以通过包含两个甚至多个 Panel 组件,来实现左右分屏,划分不同的功能区。
复杂布局
开发者可以通过在该组件的 className 配置中添加 wrap 样式,配合在 Panel 组件上添加 w-m-n + h-m-n 样式来实现复杂的布局,比如两行两列、两行不同行不同列等。
Page 组件中自带 better-scroll 插件,提供更好的滚动体验。不过,由于 Panel 中同样自带 better-scroll,当 Page 中包含 Panel 时,Page 中的 better-scroll 将自动禁用。
# 如何引入
// 注:在该框架内,已将该组件注册到全局,无需再次引入
import Page from '@/components/page'
export default {
  name: '',
  components: {
    Page
  },
  ...
}
1
2
3
4
5
6
7
8
9
2
3
4
5
6
7
8
9
# 使用示例
# 简单使用
你可以直接复制使用此处代码
<template>
  <page class="just-page-demo" class-name="hw100">
    <!-- 页面内容 -->
  </page>
</template>

<script>
export default {
  name: 'just-page-demo',
  data () {
    return {}
  }
}
</script>

<style lang="scss" scoped>
// 内嵌样式
</style>
1
2
3
4
5
6
7
8
9
10
11
12
13
14
15
16
17
18
2
3
4
5
6
7
8
9
10
11
12
13
14
15
16
17
18
# 配置列数、列宽比例和列宽比例切换器
你可以直接复制使用此处代码
<template>
  <page
    :show-width-switcher="true"
    :width-switcher="widthSwitcherConfig"
    columns="2:1"
    class="just-page-demo"
    class-name="hw100"
  >
    <!-- 第一个 Panel 占 2 份宽度 -->
    <panel class="h100"></panel>
    <!-- 第一个 Panel 占 1 份宽度 -->
    <panel class="h100"></panel>
  </page>
</template>

<script>
export default {
  name: 'just-page-demo',
  data () {
    return {
      widthSwitcherConfig: {
        // 该配置会被 columns 配置覆盖
        value: '1:1',
        // 可切换比例列表
        options: [
          '1:1',
          '2:1',
          '1:2',
          '3:1',
          '1:3'
        ]
      }
    }
  }
}
</script>

<style lang="scss" scoped>
// 内嵌样式
</style>
1
2
3
4
5
6
7
8
9
10
11
12
13
14
15
16
17
18
19
20
21
22
23
24
25
26
27
28
29
30
31
32
33
34
35
36
37
38
39
40
2
3
4
5
6
7
8
9
10
11
12
13
14
15
16
17
18
19
20
21
22
23
24
25
26
27
28
29
30
31
32
33
34
35
36
37
38
39
40
复杂布局下使用可切换比例功能
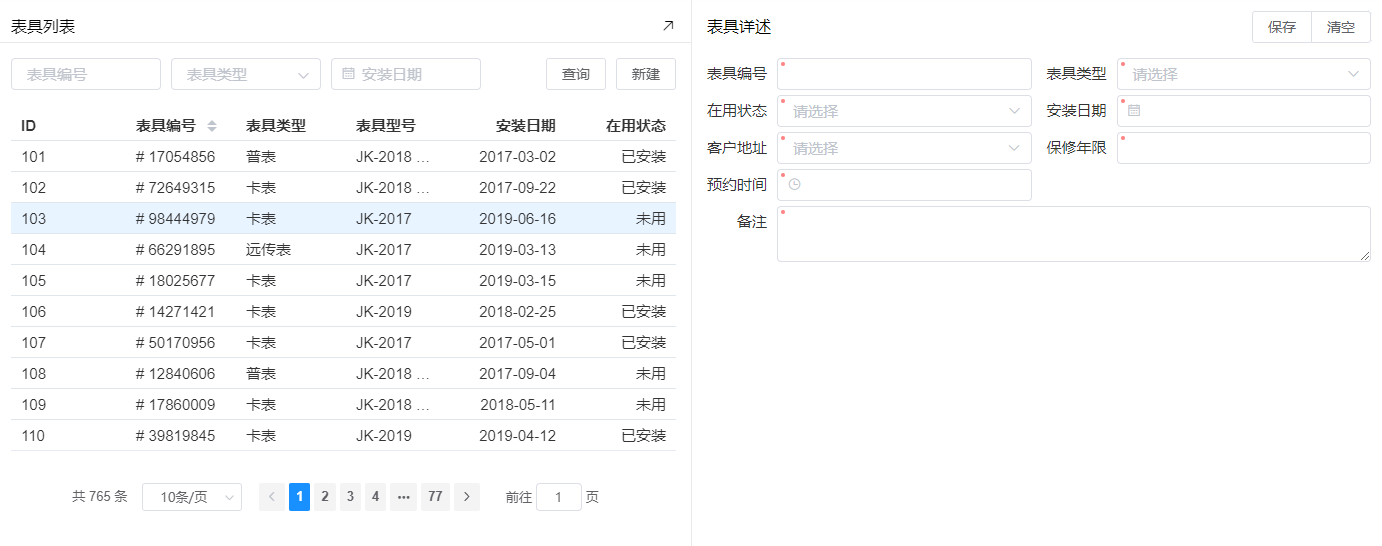
下方示例代码将生成一个常见的复杂布局:页面分两列,第二列又分为两行,共 3 个 Panel。示例将展现如何通过在第 3 个 Panel 上配置 panel-width-bind 属性,将其与同属一列的其他 Panel 绑定到一起,以便在切换宽度比例时同步更新宽度占比的。
<template>
  <page
    :show-width-switcher="true"
    columns="1:1"
    class-name="hw100 wrap column"
  >
    <panel class="h100"></panel>
    <!-- 第 2 列第 1 个 panel 增加一个自定义的引用名 form-panel -->
    <panel ref="form-panel" class="h-2-1"></panel>
    <!-- 第 2 列第 2 个 panel 通过 panel-width-bind="form-panel" 属性绑定到上述 panel -->
    <panel class="h-2-1" panel-width-bind="form-panel"></panel>
  </page>
</template>

<script>
export default {
  name: 'width-switcher-demo'
}
</script>
1
2
3
4
5
6
7
8
9
10
11
12
13
14
15
16
17
18
19
2
3
4
5
6
7
8
9
10
11
12
13
14
15
16
17
18
19
不再需要设置 Panel 的宽度样式
通过上述两个示例,你可能已经注意到在配置列数和列宽比例相关参数后,Panel 上便不再需要配置 w-m-n 样式,因为此时 Panel 的宽度将由 Page 接管。
# 属性
| 属性名称 | 属性说明 | 默认值 |
|---|---|---|
| className | [String] 自定义容器内容盒子样式名。 在 Page 组件内包含 Panel 组件时,需要设置该属性值为 hw100 | 无 |
| columns | [Number|String] 预设 Page 中 Panel 的列数和宽度占比,设置为不同的类型表示不同的含义: Number: 例 :columns="n",表示将宽度分为 n 份,每个 Panel 占用 1 份。String: 例 columns="2:1",表示将宽度分为 2 + 1 = 3 份,两个 Panel 分别占用 2 份、1 份。再例 columns="1:2:1" 表示将宽度分为 1 + 2 + 1 = 4 份,此时需要在 Page 中放入 3 个 Panel,分别占用 1、2、1 份。以此类推。 | 无 |
| showWidthSwitcher | [Boolean] 是否显示宽度比例切换器。开启后将在 Page 中第一个 Panel 的标题栏右侧显示切换器。 | false |
| widthSwitcher | [Object] 宽度比例切换器配置,包含 value options 两个属性:value: 初始比例,该属性可被 columns 配置覆盖。 options: 可切换比例列表 | value: 1:1 options: 1:1, 2:1, 1:2, 3:1, 3:2, 1:3, 2:3, 4:1, 4:3, 1:4, 3:4, 5:1, 5:2, 5:3, 5:4, 1:5, 2:5, 3:5, 4:5 |
# 插槽
| 插槽名称 | 插槽说明 | 默认内容 |
|---|---|---|
| default | 默认插槽。 使用示例中 page 标签内的注释处的内容将放入该插槽。 | 无 |